Okay, so I am a HUGE fan of the Birthday Board. I found it a while ago HERE and posted it to Pinterest. (Addicted to Pinterest so bad!) And decided I needed to make it for my mom and dad for Christmas (There are 32 of us so far). I now have 2000 repins and counting because it is SUCH A GREAT IDEA! In the process, I had people comment on the pin and ask if anyone was making them or selling them. I am in the process of getting an Etsy account and decided this would be a great thing to start my little shop! Well, I have some orders from some great women even BEFORE my shop is even up! I am so excited! Hopefully they like them as much as I do!
I also had some ladies ask if there were instructions. I am going to give them! I actually found a site that tells you how to make them here. But I am making them a little differently, so I will still tell you how I made them!
 Supplies:
~1/2 X 6 X 24 board (I got mine from Lowe's)
~Vinyl (I cut my own. There are tons of places online you can get vinyl from if you don't have your own cutter.)
~1 1/2" circles, hearts or whatever (enough for 12 months and the number of birthdays in the family) you can get them from the craft store, but if you have a lot to do you can also order them online
~3/4" 'S' hooks (couldn't find them at Lowe's. Got them at Home Depot)
~#216 screw eye hooks (better price at Lowe's [pkgs of 10] but you can get them at Home Depot too[pkgs of 8])
~Sawtooth wall hangers (Walmart, or home improvement store)
~paint and brushes
~wood glue
~drill with 1/8" drill bit and 1/16" drill bit

 Directions:
Drill holes in circles (not the ones for the months) on the top and bottom.
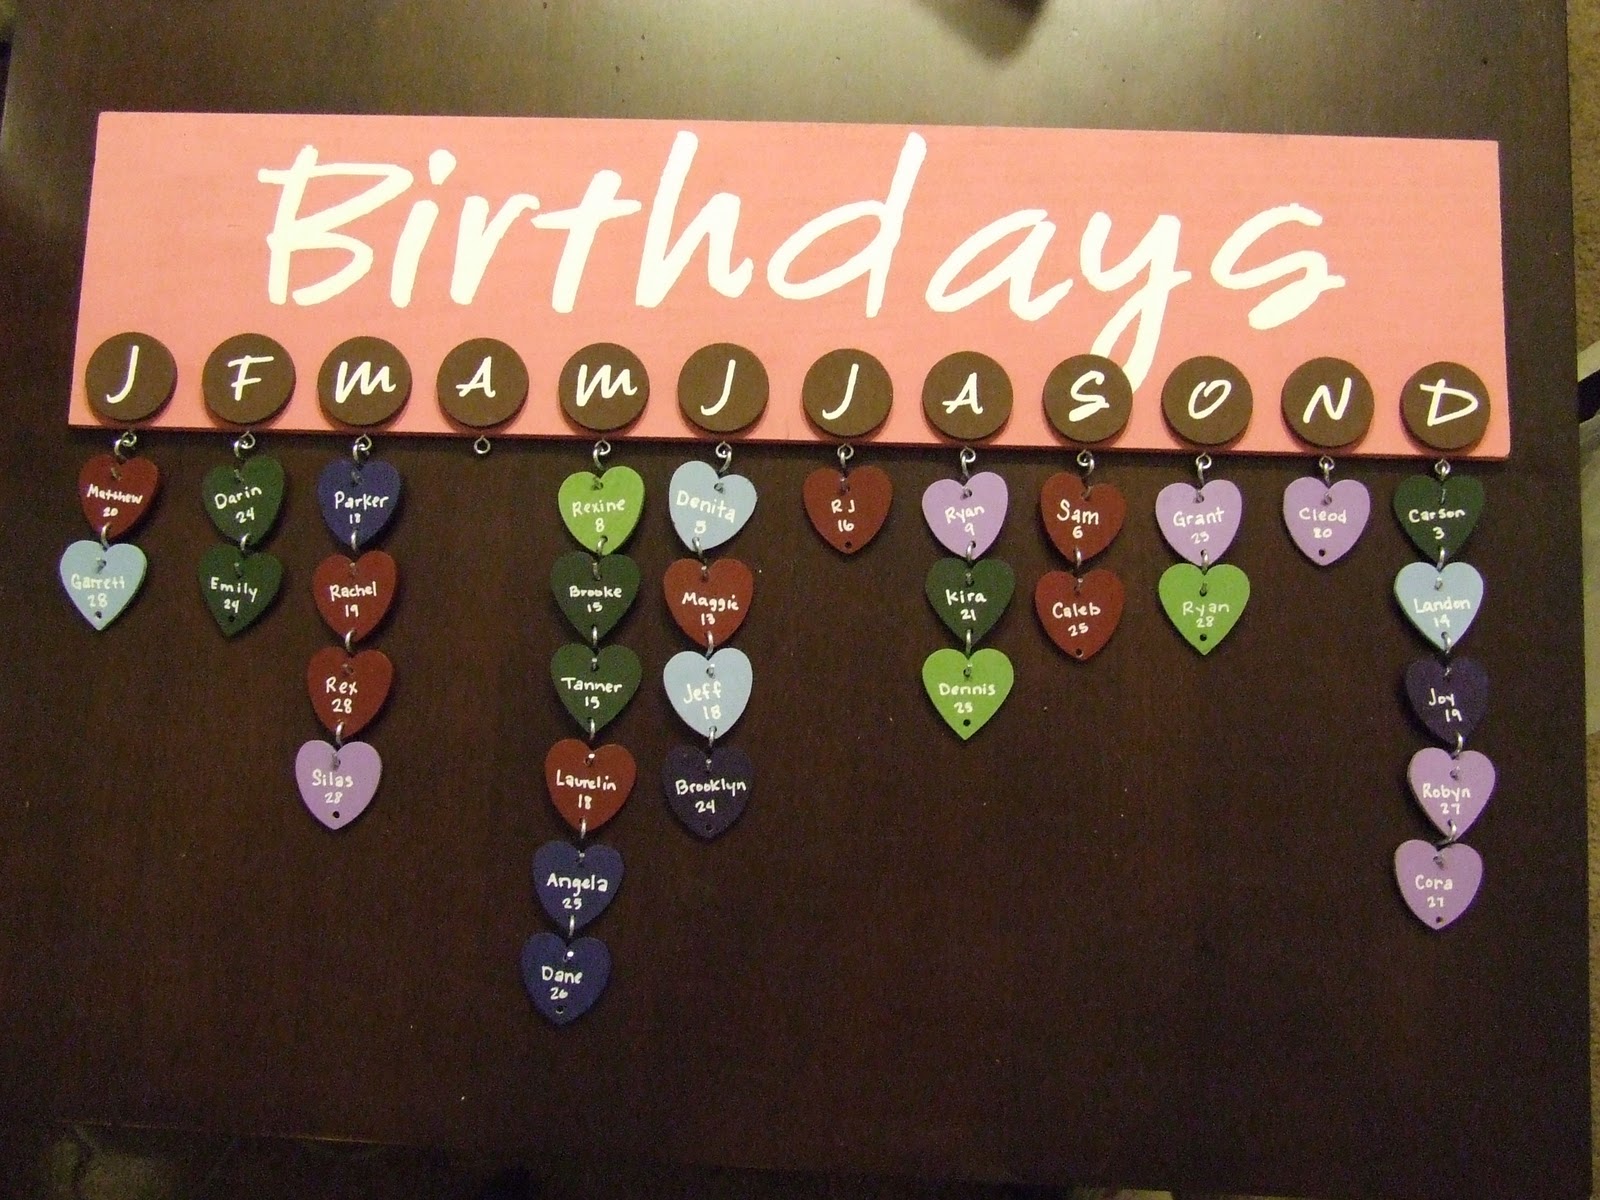
**For this board I used hearts, but I will be giving instructions for circles, since they are most inexpensive and most requested.**
 Paint board and circles your desired colors. Each of my colors represents a family. You can make yours however you want.
 Once paint is completely dry add vinyl to month circles and Board. Glue circles to board. I hate measuring, but it's a good thing to do for this. From the end measure 1 inch, then every 2 inches after that. So from each end it will only measure an inch, but in between every month there is 2 inches.
  On the birthday circles I wrote the names and date with a white paint marker. You can get creative and use scrapbook paper with the names typed on and mod podged to the circle like she suggests here (toward bottom of post)
Underneath the month circles screw in eye hooks. You can drill a starter hole or just use good old fashion strength to screw them in. Or you can go a completely different direction and us an Awl (used in leather making) and a hammer to start a hole.
Next simply connect 'S' hooks to the eye hooks and circles like this!

 The painting and drilling are time consuming, but if you don't go too crazy with the colors, you can get an assembly line going pretty good and it will go by pretty fast. The more you drill, the faster you will get. Make sure you have extra circles because they can crack if you get too close to the edge or press too hard with the drill. (I ran out of hearts and had to buy more the first time because I did NOT anticipate that happening!)
I hope this has inspired you and given you some ideas! I AM selling them. My Etsy shop is called Pearlized and will be offering to sell them from there in the New Year!! I am selling kits mostly, but will be selling completed boards too. Email me or check my shop for details.
Good luck and Happy Crafting!

** I have another picture of one I've done on the next post check it out!
LOVE THIS IDEA!!! Can you share what size you cut the Birthday letters & the months out at? Thank you!! Can't wait to make 2 of them for the holidays.
ReplyDeleteThank you Debbie! The size will vary with every font, but I usually try to make ' Birthdays' between 3 and 4 inches tall. The letters I make about an inch tall. It depends on how big your hearts or circles are. It also depends on the size of board you get. I make mine 6 x 24 but the board is about 5 1/2 inches, not 6. Hope this helps! Thanks for visiting! You can see some of my other board here on my blog or on my Etsy shop www.pearlized.etsy.com. Good luck!
ReplyDeleteThis comment has been removed by the author.
ReplyDelete